April 27, 2015

Our Favorite Project


We were commissioned to design, create, build and hand paint a large “treasure” chest to hold wedding cards at a customer’s reception.  We were provided with all the details, from size, floral design and colors and we went to work creating a stunning masterpiece.  Take a look and see how we went about the process.

The very first part of the chest to be built was the top.  My husband began by cutting strips of poplar wood and strategically angled each individual one and pieced them together to form the curved lid.


He then created the frame that surrounds the lid, and sanded it to an ultra smooth finish.  In the meantime, while he was creating his magic, I had been working on the design that the customer requested.  She sent pictures of her invitations and reply cards, and I incorporated the pattern into the completed design for the lid...


...and then the border for the sides of the box.  Shown here is just the front, but the design continues around the entire box, surrounding all four sides.

Once the pattern is in place, it's ready to be carefully traced onto the chest with graphite paper and a stylus.  I then worked on the colors according to the customer's preferences and emailed pictures of painted samples for her approval.  She chose bright color variations of purple, orange and pink.  


 Here is the completed lid...


The expertly crafted chest was then protected with four coats of polyurethane and this is the final, finished chest ready for the customer's wedding.


With pride, we share the customer's comments:


" I received the chest in perfect condition and absolutely love everything about it! The design is even more beautiful than pictures could do justice, and the craftsmanship is impeccable. Truly, I am so beyond impressed with the work you and your husband have done. I can see how much you love what you do, because it shows in your creations.


April 24, 2015

Well, hello there!

It's been quite some time since I've posted anything and even with the best intentions, 
I found myself being pulled away by establishing a successful online business and medical issues that took up nearly all of my time over the last 3 years.


So again, with my very best intentions, I've vowed to set a goal of posting at least once a month.  There's so much I want to share, from our craft, to friends I've met on Etsy.  I can't wait to share some of their creations with you as well.  You'd be amazed at the unique talent that's out there and I've met some of the best of them.

For now, just for starters, I'd like to share our Etsy shop link with you.  We offer such a huge variety of items from home accessories, to children's toys to wedding decor.  Our biggest claim to fame is our ability to customize just about anything that our customers request.  They provide us with the idea and details and my husband and I work hard to make their wishes come true.  We truly do not believe in the word "no" unless for some reason, we just can't accomplish a task.  Rest assured, we research every avenue possible to make an idea a reality.

I invite you to visit our shop and see what we have to offer.  Our customer satisfaction is our utmost commitment and our reviews from previous customers offer testimony to that fact.  Feel free to read a few of them while you're visiting!  We have 9 or 10 different sections to browse at any one time individually or take in the whole shop!  Here's the link:

https://www.etsy.com/shop/2HeartsDesire?show_panel=true

Don't ever hesitate to contact us for any reason!  We can be reached directly through the Etsy shop website or you can always email us at hearts.desire@hotmail.com.  We look forward to your visit and hope you stop in often even just to say hello.

We can also be found on: 


http://www.facebook.com/pages/2hearts-desire/223247681018755?ref=hl

March 30, 2012

Craft@52 Oxford

Hearts Desire has recently been invited by a team of volunteers named Team Eileen to join them at their fundraiser/benefit to raise funds for the Dana Farber Cancer Institute and the Susan G. Komen Foundation to support the cure for breast cancer.

We are so honored.

Please join us if you're in the Boston area on April 20th!  Craft@52Oxford is being held at Harvard University at 52 Oxford in Cambridge.  The hours are 3:00-7:00 p.m.  There will be a wide variety of artisans with their items for sale to the public and will donate a part of their sales to support the cause.

We will be displaying nearly all of our items in our shop on Etsy, along with a number of new items not even available to the public yet.  As with all of our products, we are more than happy to custom design a piece for you or that someone special in your life.  Choose your item, your colors, your pattern, your size, your theme!  Come and chat with us and we will do everything in our power to create a gift that is a direct reflection of you.  We specialize in shower, wedding and baby keepsakes and can incorporate any idea you may have.  Stop in and say hello!

More importantly, stop in and show your support!  We're looking forward to seeing you!

For a sneak preview, visit our shop at www.2heartsdesire.etsy.com.

~K

January 17, 2012

My Zentangles

Zentangle, if you haven't heard about it, is an art form created by Rick Roberts and Maria Thomas.  It is completely addictive.  Zentangle is a registered trademark of Zentangle, Inc. and more information about this fascinating art is found at zentangle.com.  I cannot even attempt to tell the story as they do, so I encourage you to visit their website.  You won't be sorry you did!

It started with me when I saw an ad in my local paper for joining a class.  I was intrigued, so I signed up and took my then 20 year old daughter with me as a birthday present for her.  I knew it would be right up her alley.  We had a blast and then we were completely hooked.  Needless to say, all 3 of my children, who I've always encouraged in art as they see it, received a beautiful kit for Christmas from Mom.  I'm happy to say, that we're all thoroughly enjoying each others' art and the special peace that tangling brings.  As it turned out, Rick and Maria are from the same small town I grew up in and went to school with my brothers and sisters.  I was completely overwhelmed by their hospitality, sunny dispositions and general good will, that I wish them all the success in the world.  It's quite an amazing thing they've created and chosen to share.

Try it...you'll see.

Here are a few of my tangles


And here are some from my 2 daughters and my son


Theirs are done on actual Zentangle tiles, while mine are done in a small sketchbook, hence the color variation in the pictures.  They are quite remarkable aren't they?

And you don't need an ounce of artistic ability to be able to do this!  ANYONE CAN DO IT!

Give it a try and have fun!!!


December 30, 2011

Learn a Simple Tea Bag Fold


I am not one to sit idle anywhere doing nothing.  I usually try to make the most of my time, even if it means severely multitasking.  During the holidays, when I got the chance to sit and relax, I found myself creating these wonderful tea bag folds.  Something I picked up on the internet through Handcrafted Greetings.com.  I'm always up for trying something new, and this came just in time.  I was able to relax while still creating wonderful handmade bows for some of my gifts.  The instructions here are for a star with an open center.  Hopefully, you'll be able to follow along.  If not, feel free to contact me!

Start off with 8 equal squares of scrapbook paper, wrapping paper, or maybe even some on the web that you can print out.  The squares can be any size.  Mine here, are 3" square and once assembled, gives you almost a 5.5" bow.  These are great for embellishments and greeting cards too.
The Beginning

You'll need 8 pieces of printed paper.
A bone folder (or pencil) to get your creases tightly folded.
Glue...you'll see here I pictured plain white craft glue, but I ended up using a glue stick towards the end.  Either one will work.


.
 Follow these steps for each of the 8 squares.


 Turn paper over, printed side down.


Fold in half, then unfold.


Fold in half again in opposite direction and unfold.  You now have a center point.


Fold all four corners into the center, so the end result looks like a smaller square (below).


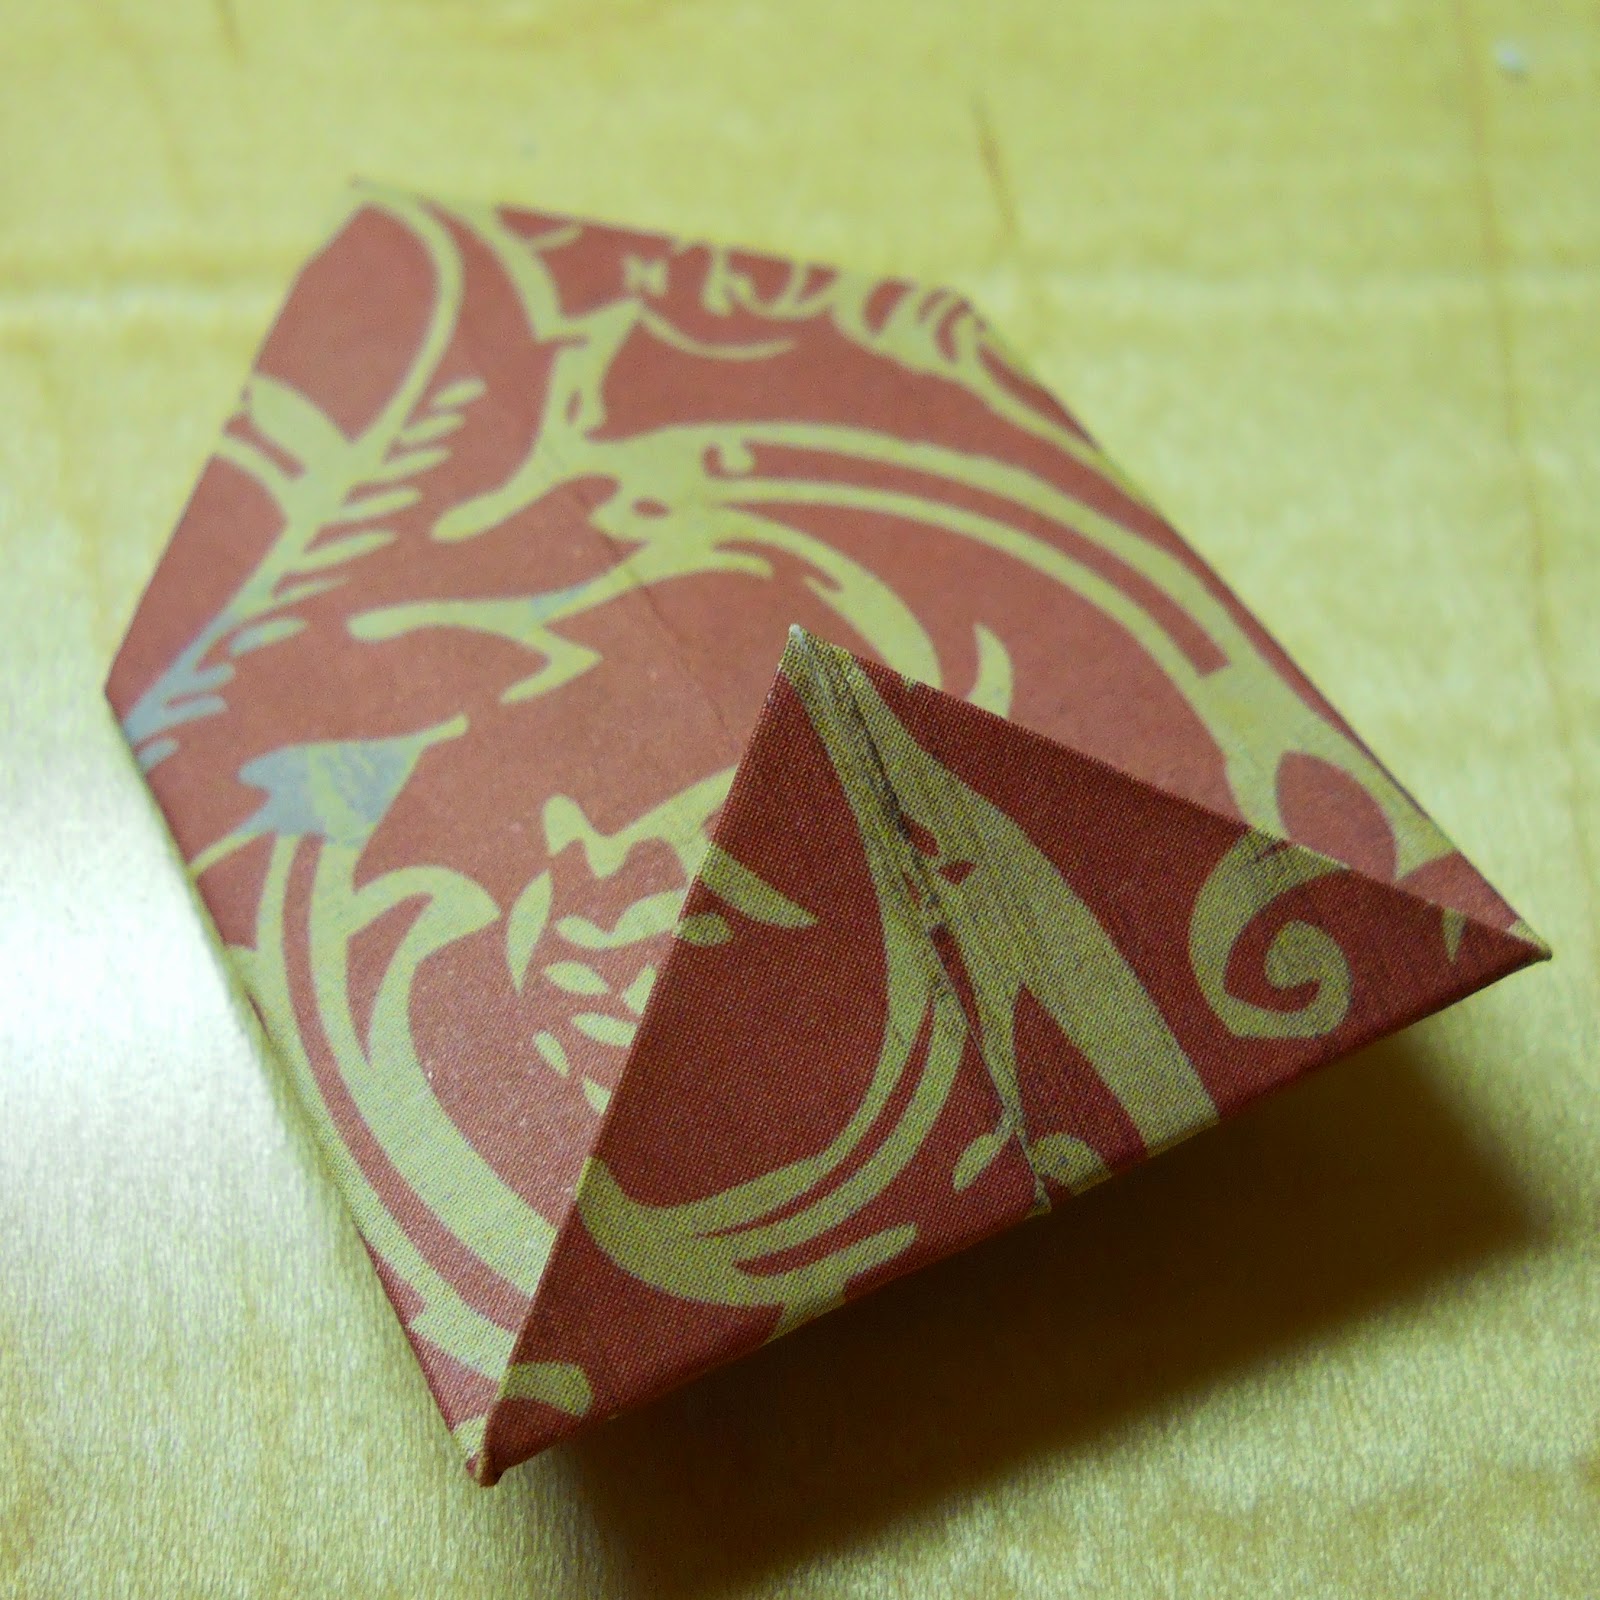
 Take the left and right corners and fold into the center and flip over as pictured below.


Fold the bottom corner up as shown and continue to fold the
remaining pieces of paper in the same fashion.


The left corner of each piece slides into the tab created in the last fold.  As you connect them, they'll take shape of a star.

Here are 3 squares put together.


Here are 6.  Notice the purple area on the right of the top piece.  I love purple, so naturally I have a purple glue stick!  lol  I just put a dab of glue on the right side and slide the left side into the tab and press.


Once you have them all together, you may have to adjust the placement.  Luckily the glue hasn't completely dried and you should be able to slide them around a bit.

And here's a finished star with an open center.  You can glue a coordinating piece of card stock on the back if you'd like.  I usually finish mine off with a gemstone in the middle.


Here are my finished bows adorning Christmas gifts I made for my brothers and sisters.


When attaching them to a gift or card, I just simply use double-sided tape, but glue would work just as well if that's all you have.

Give these a try!  They're really very easy to make, and if you want to do a bunch at a time, you can do all the folding first, and then the assembly second.  P.S.  I usually let them dry flat under a heavy book.  What a great way to use up some small pieces of paper!